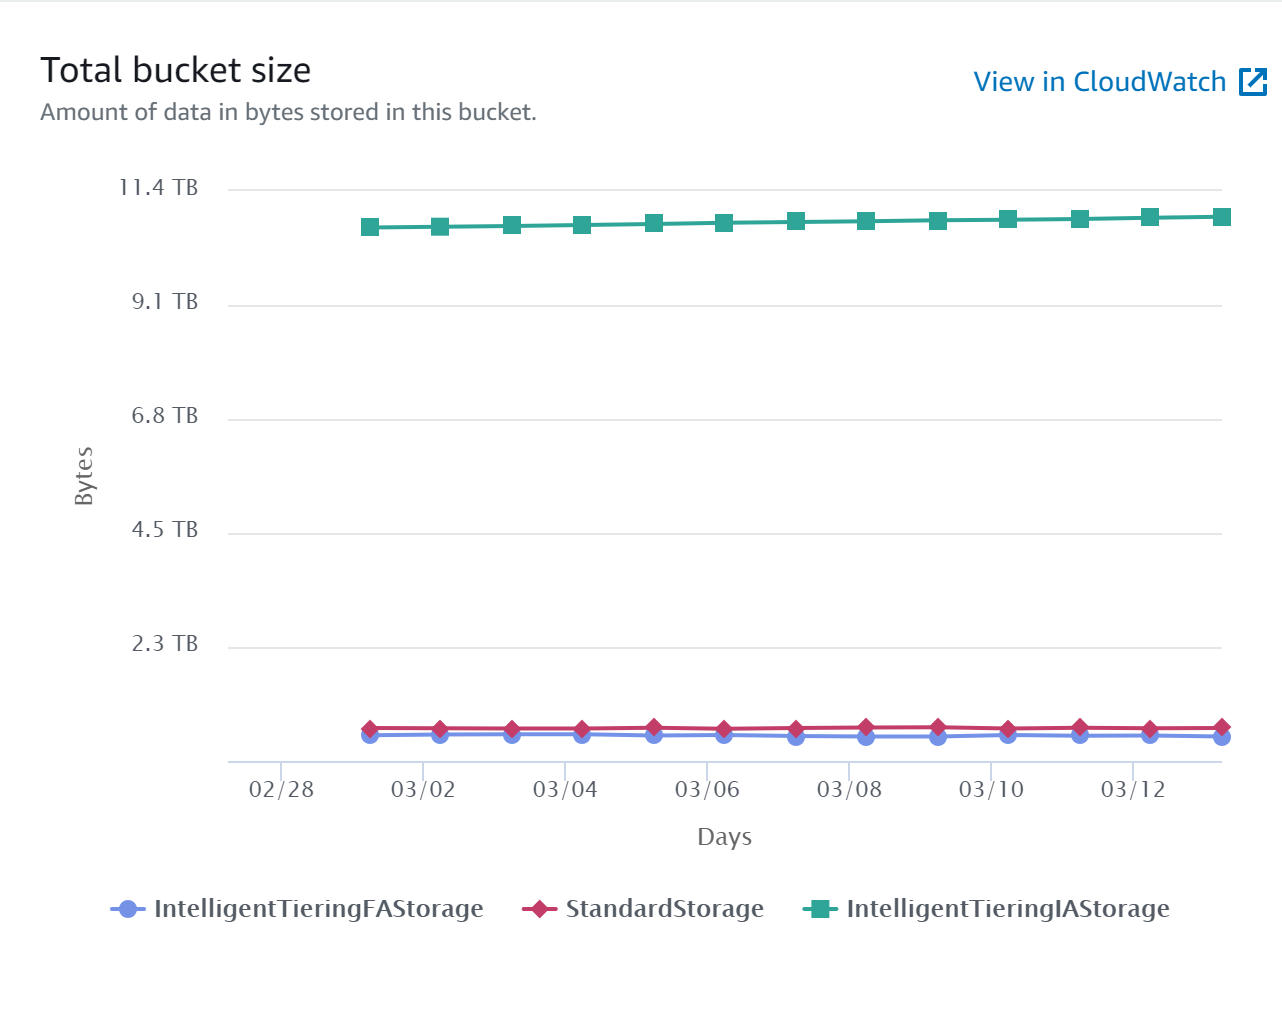
Over the years, PitchPrint has processed over 50million photos, amounting to over 12 terabytes of data generated and stored, that is an average of 2000 photos being processed on our systems every hour.
When a user uploads a Photo on our application, the image file goes through a series of processes which generates a thumbnail for previewing on the gallery panel. In addition, a low resolution version of the thumbnail is generated for use on the browser canvas and finally, the original file is trimmed, optimised and stored for use in the final PDF for print.
This article will discuss the operations and introduce new innovations we have added to the pipeline to improve the overall Photo experience for our users.
AutoRotate:
When you take a picture with your phone in portrait mode, that picture appears vertically as it was captured. Alternatively, when you rotate the phone horizontally while still in the camera app, the photo is expanded appropriately, not rotated or skewed in a way that requires you to tilt your head to view it. This natural behaviour of the camera app is powered by an intelligent programming which appends additional information to the photograph, instructing any image viewing application on how the camera was positioned when the photo was taken.
This additional data is called Exif data. It is attached to every photo you take, and here's an example of what it looks like:
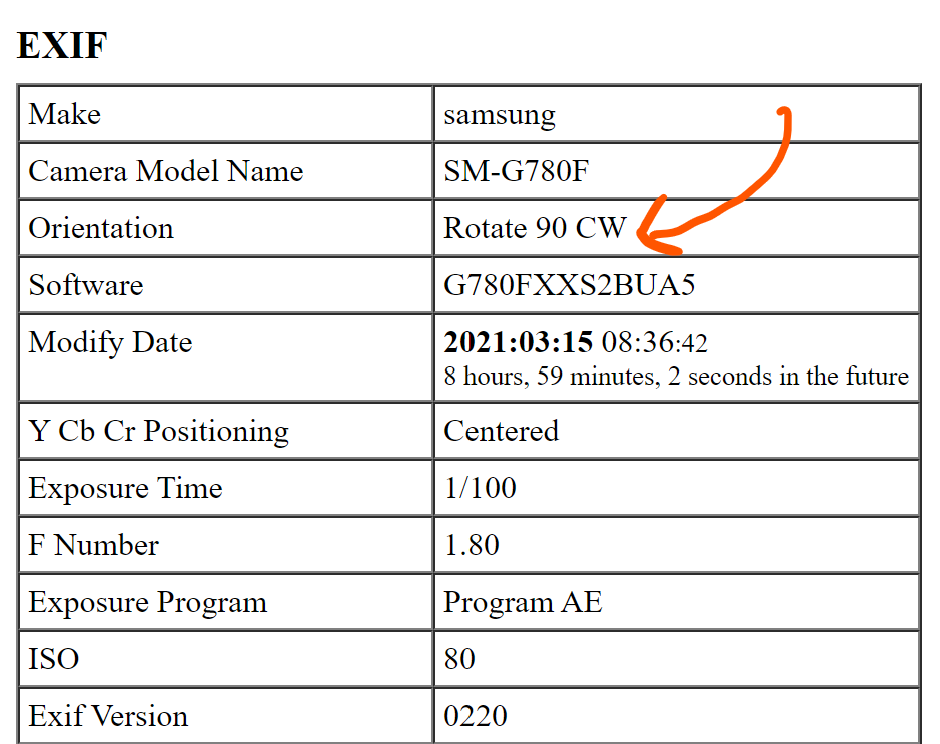
Auto rotation is the process of reading the photo's Exif data and displaying the photo as intended.
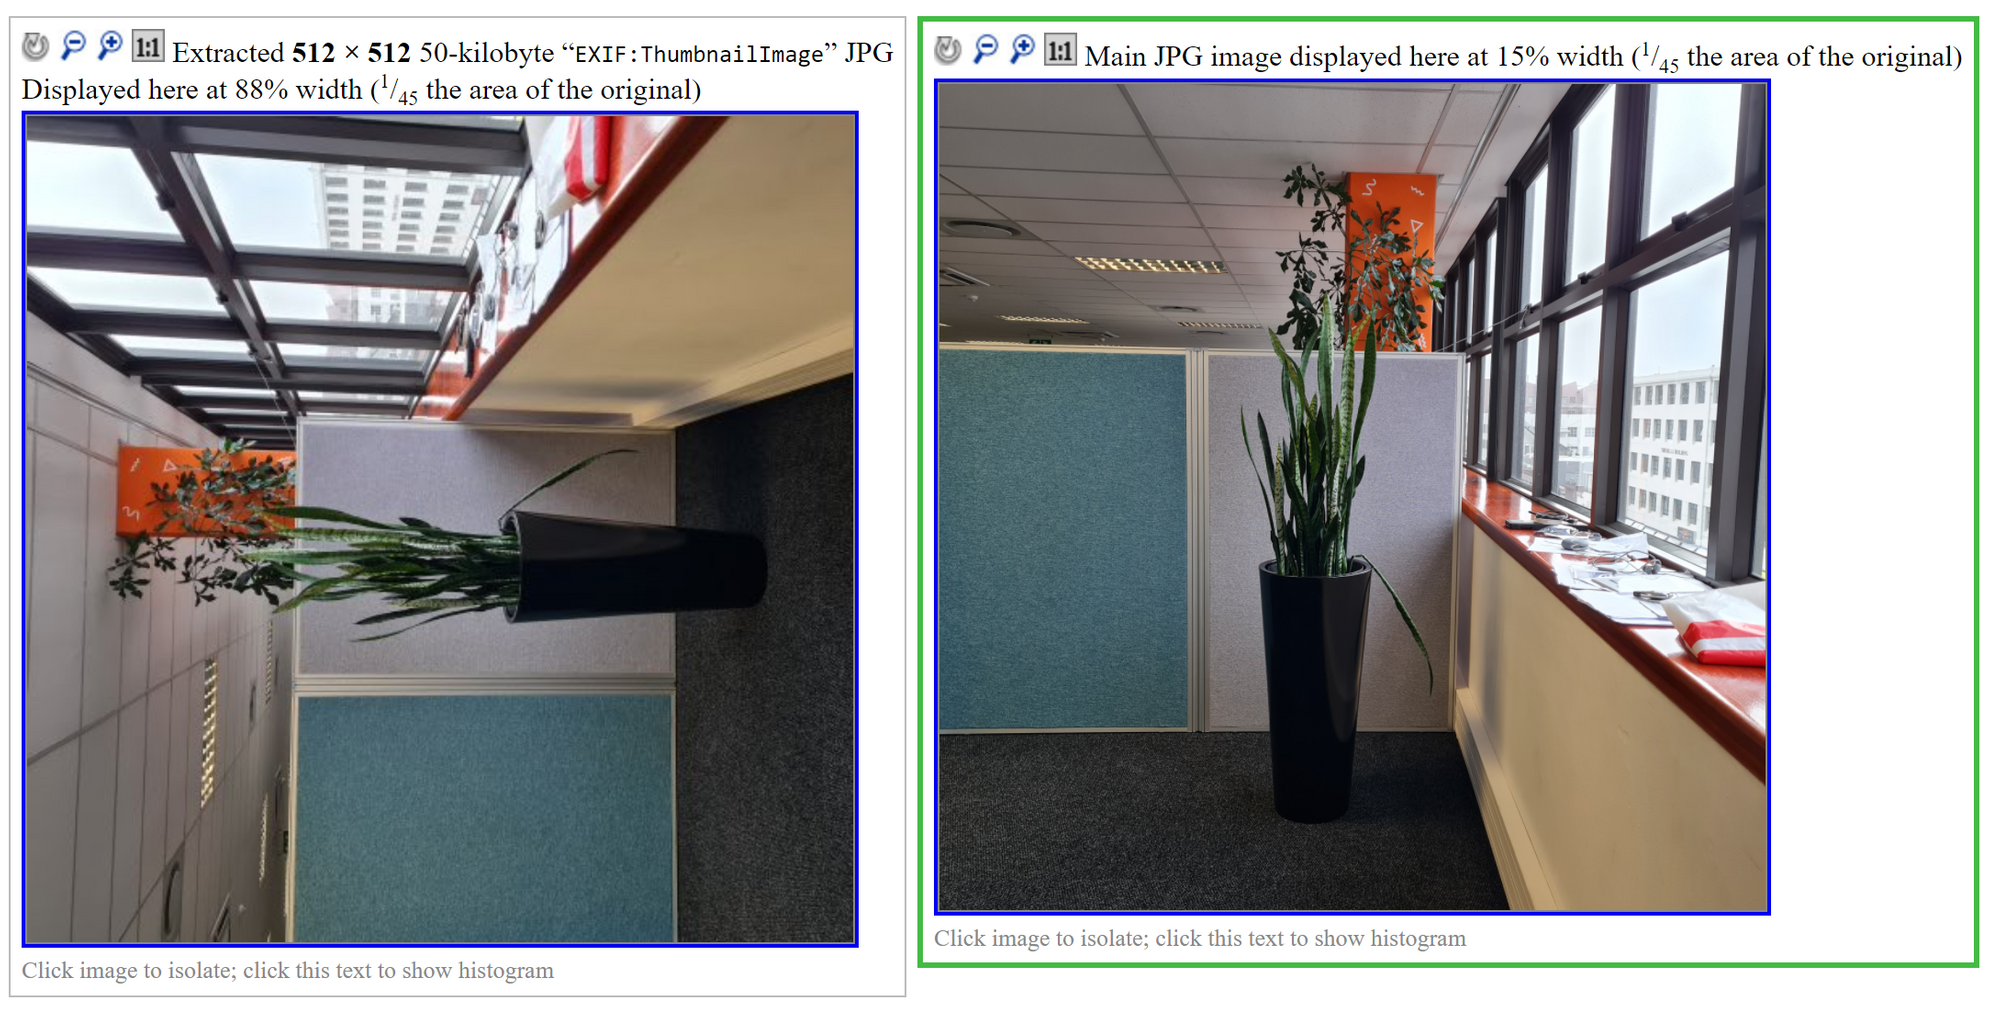
A few months ago, our application didn't have this natural behaviour programmed into it. After uploading photo images, our PDF distiller did not auto rotate these images even though the browsers did in the editor. This led to few cases of user photos looking skewed and unnatural in the final PDF files.
In our upcoming pipeline of updates, our first update will enable our PDF distiller to auto rotate all images and update the Exif data accordingly so photos look the same in the browser during editing and in the final PDF.
You can view your Photo's Exif data using Photoshop or online via the URL below: http://exif.regex.info/exif.cgi
Color Operations:
Our user Photos come from multiple sources such as phones, cameras, photo editing software, scanners etc. Interestingly, these tools process images differently, especially colours. In order to maintain a consistent print output, we have added a colour correction process whereby you can choose to apply a particular ICC profile to all photos uploaded for a design.
Prior to this, our application simply utilised the original photo uploaded in the final PDF file, which results in a mix of CMYK vector elements with sRGB images.
With this system, you can maintain a consistent colour profile across the board, CMYK or RGB and even target specific colour gamut for your print output. We have categorised the standard ICC profiles under CMYK and RGB.
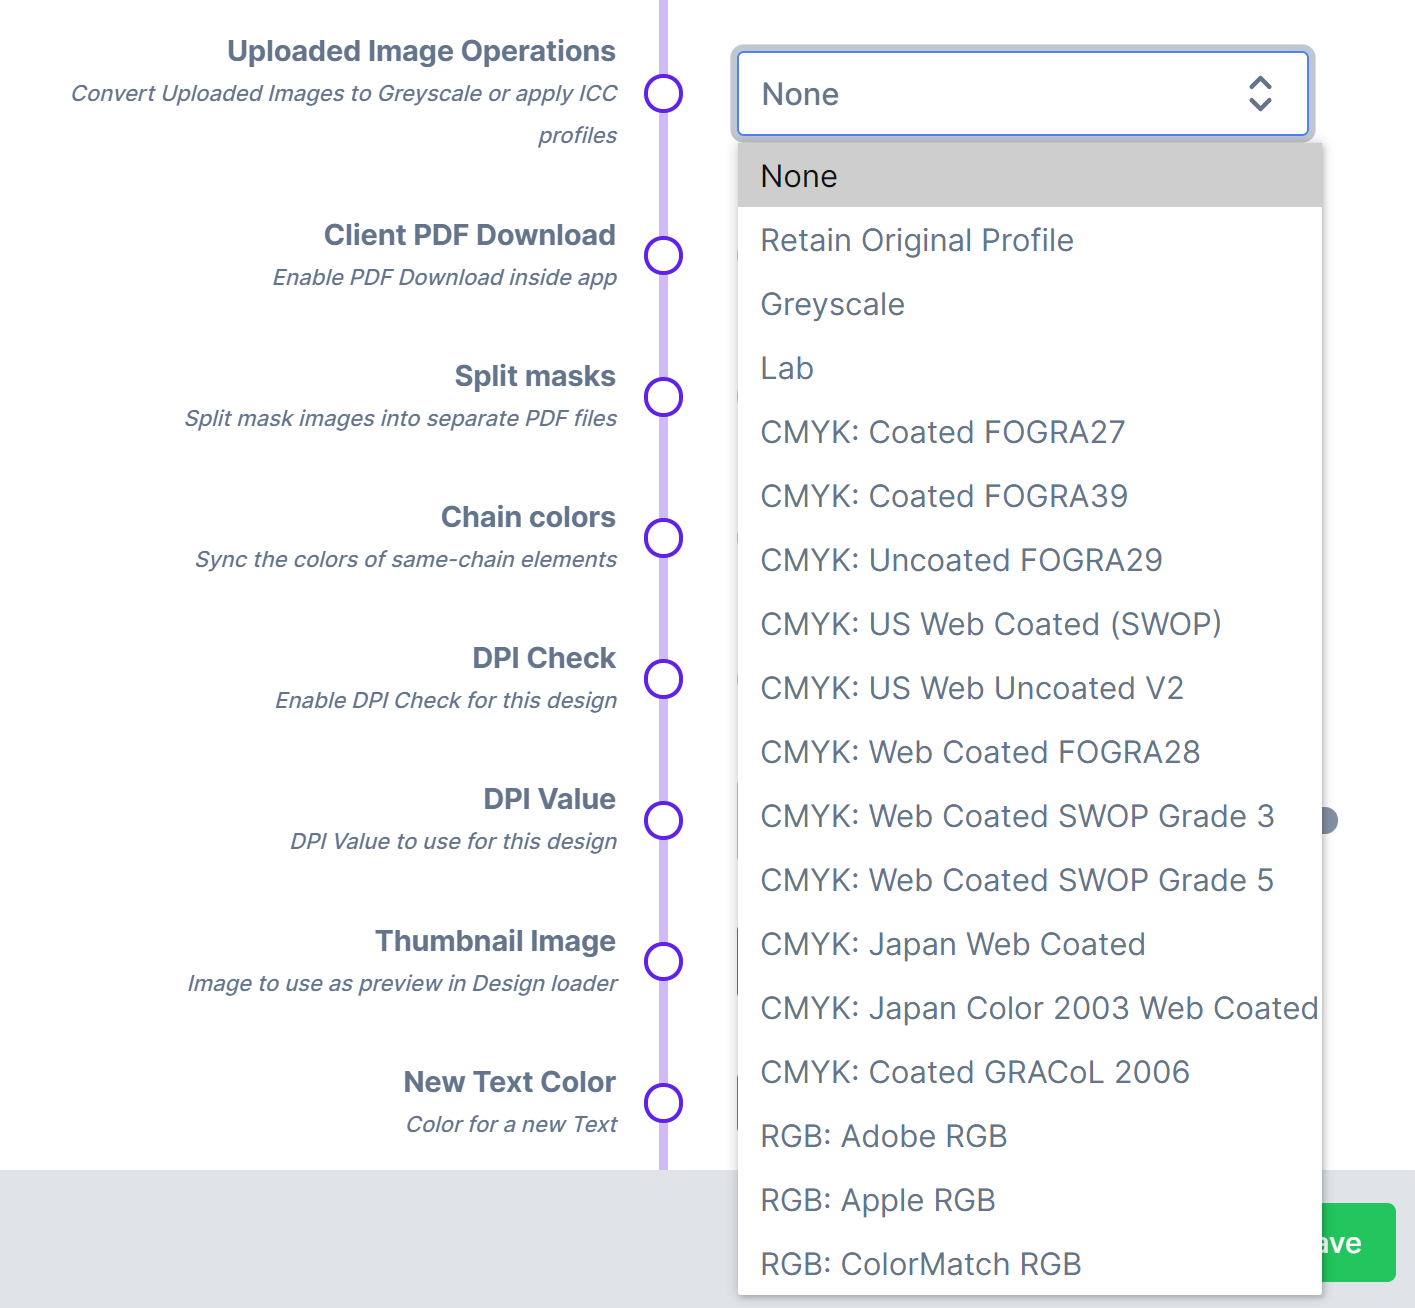
With this new update, we have removed the option for Greyscale and added it as a profile. Retain Original Profile will simply attach the original image's ICC to the newly generated image.
Caveats: PNGs do NOT support non-RGB profiles like CMYK. As such, if you have selected a non-RGB profile and your user uploads a PNG photo, either of the two scenarios play out: If the Photo has transparency, the profile will be ignored and treated normally as a PNG file. If it does not have transparency, then the image can be converted into a JPEG file with a 91% quality to optimise the size and subsequently apply the CMYK profile.
Custom Profiles:
Should you want to apply your own custom profile, ICM, ICC or colour correction file, you can send it to us and we will apply it to any photo your customer uploads. With this, you can have all uploaded photos tint to a particular colour or expunge certain colours as your process requires.
File Formats:
At the end of the process, we clone the processed image data and generate a thumbnail, which customers get to preview on the left panel, a low resolution version for use in the browser and save the final copy in its original size for use when generating the PDF file.
You may ask, why do we need a low resolution, why not use the original file in browser for better display?
Well, the challenge is size. Our system utilises HTML Canvas for image manipulation and Canvas deals with raw image data, not a compressed version. Let's zoom into this for a bit: Your jpeg file consists of millions of pixels all zipped together and compressed so as to be light for a faster manipulation via the browser. When you work on the canvas, you have to unzip all those pixels and process them one after the other.
In comparison, imagine having to deal with millions of unzipped files in your finder or folder, as opposed to the ease of handling one single file (when they are all zipped together). So, the fewer the pixel count, the easier it is to manipulate for the computer or any mobile device. This is why our app generates a low resolution format for use in the browser.
The journey is just getting started, you can read more here, about how we handle file uploads. or how you can capture every photo your users upload using our Webhook process: https://docs.pitchprint.com/article/99-webhooks
